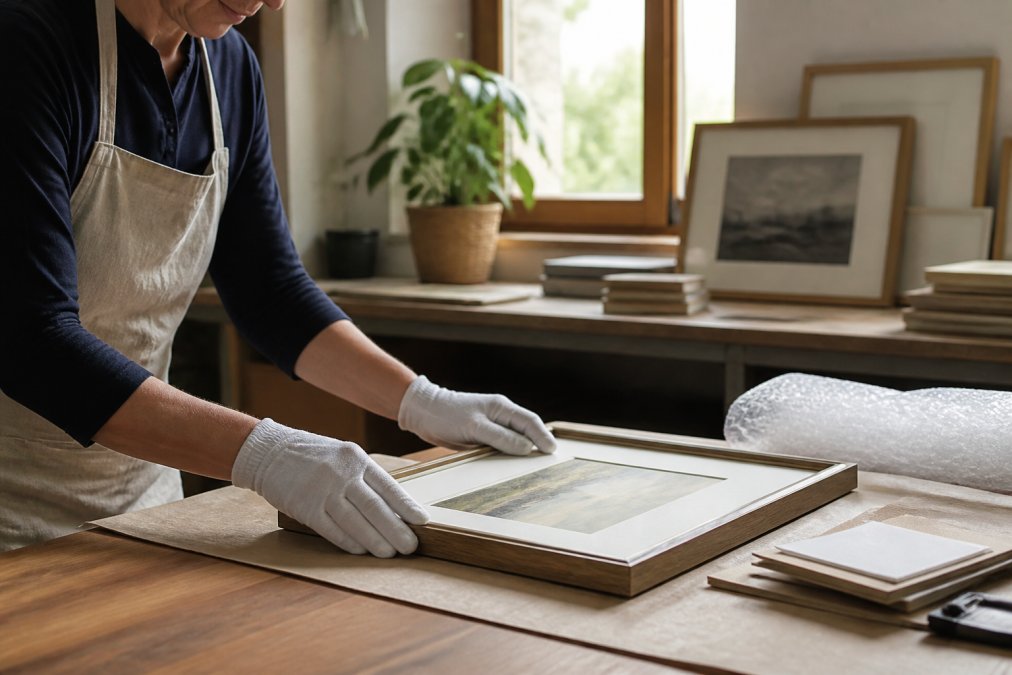
 ultimate-guide
How to Frame Art for Longevity: A Complete Guide
Table of Contents
- Why Framing Decisions Determine How Long Art Survives
- Archival Framing Materials: What to Use and What to Avoid
- Museum Glass vs Regular Glass: Which Glazing Actually Protects Your Art
- How to Frame Art for Longevity: Step-by-Step
- How to Prevent Art Fading: Controlling Light, Humidity, and Temperature
- Digital Prints vs. Original Works on Paper: Do the Rules Change?
- Troubleshooting Common Damage and Budget-Friendly Archival Options
- Frequently Asked Questions
Last Updated: August 17, 2026
Why Framing Decisions Determine How Long Art Survives
Most people treat framing as a finishing touch, choosing whatever is cheapest or fastest. This is exactly how a print you loved fades into a pale, yellowed ghost within a decade.
Framing is preservation. Every material touching your artwork, every layer of glazing, and every environmental condition will either protect it or slowly destroy it. The difference between a piece that survives fifty years and one that deteriorates in five almost always comes down to decisions made at the framing stage.
This guide from Runway & Heirloom Art covers how to frame art for longevity, from choosing archival-quality materials to troubleshooting existing damage. One clarification: framing for longevity is not the same as framing expensively. Many critical preservation choices, like using pH-neutral materials and keeping art out of direct sunlight, cost little or nothing extra. What they require is intention.
Archival Framing Materials: What to Use and What to Avoid
The biggest mistake most framers make is using whatever materials are available rather than what conservation standards require. Standard framing materials contain acids that migrate into your artwork over time, causing irreversible yellowing, brittleness, and fading.
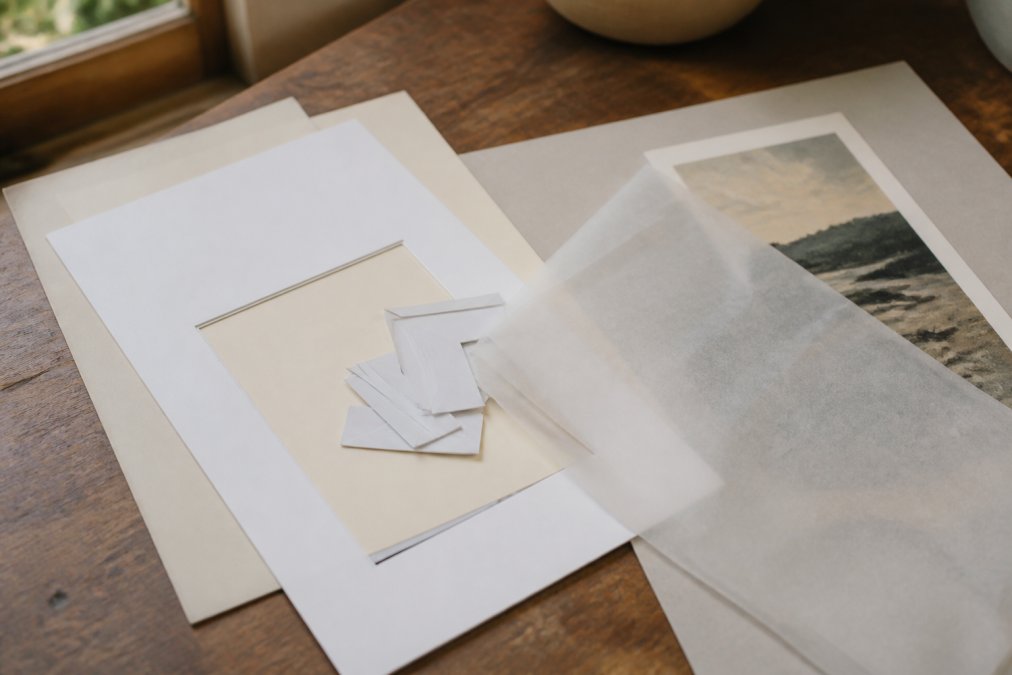
Archival-quality framing uses only pH-neutral or alkaline-buffered materials in every layer, ensuring no acidic compounds contact the artwork. This standard is what museums follow and applies equally to a print in a nursery as to a watercolor in a gallery.
Acid-Free Mats and Backing Boards
Standard mat board is wood-pulp based and acidic. Over time, acid migrates into the paper, creating the characteristic brown "mat burn" line seen on older framed pieces.
Use instead:
- Acid-free mat board made from cotton rag or alpha-cellulose, labeled as pH-neutral or museum-grade
- Buffered mat board with an alkaline reserve, which neutralizes any acid migration from the artwork itself
- Acid-free foamcore backing boards only; standard foamcore is highly acidic
- Archival corrugated board or Coroplast as a rigid backing alternative for larger works
The mat also creates a spacer between the glazing and artwork, preventing them from touching. This matters especially with acrylic glazing, which generates static and can pull media off pastels or charcoal drawings.
Avoid regular cardboard entirely, it is one of the most acidic materials you can place against a print, and the damage is not reversible.
Reversible Mounting Methods That Won't Damage the Paper
How you attach artwork to its mat is where many otherwise careful framers go wrong. Permanent adhesives, including most craft store tapes, are a conservation disaster. They yellow, bleed through paper, and are often impossible to remove without damage.
Reversible framing uses attachment methods that can be undone without harming the work. According to the Library of Congress preservation guidelines, reversibility is a core principle of archival practice.
The two best reversible options for works on paper are:
- Mounting corners made from polyester or acid-free paper, which hold artwork at its edges without any adhesive touching the surface
- Japanese tissue hinges attached with wheat starch paste or methylcellulose, which are reversible with moisture and have been used in conservation for decades
Avoid pressure-sensitive mounting tapes, spray adhesives, and dry-mount tissue.
Museum Glass vs Regular Glass: Which Glazing Actually Protects Your Art
Glazing is the single most impactful material choice for how to frame art for longevity. UV light is the primary driver of color fading, and standard glass blocks almost none of it.
UV-protective glazing filters ultraviolet wavelengths, typically blocking 97-99% of UV radiation. Standard picture-framing glass offers essentially no UV filtration.
| Glazing Type | UV Protection | Clarity | Weight | Best For |
|---|---|---|---|---|
| Standard glass | None | Clear but reflective | Heavy | Short-term display only |
| Non-glare glass | None | Diffused | Heavy | Low-traffic walls |
| UV-filtering glass | 97-99% UV blocked | Clear but reflective | Heavy | Most framed artwork |
| Conservation/museum glass | 99%+ UV blocked | Near-optically clear | Heavy | High-value originals |
| UV-filtering acrylic | 97-99% UV blocked | Very clear | Lightweight | Large pieces, shipping |
For most framed prints, UV-filtering acrylic is practical. It is lighter than glass, shatter-resistant, and blocks UV effectively. The main drawback is that acrylic generates static, unsuitable for works in pastel, charcoal, or loose media. For those, use UV-filtering glass.
Museum-grade glass offers the highest clarity and UV filtration but costs significantly more. For a fine art print you love and want to last, UV-filtering acrylic or standard UV glass is sufficient.
According to the American Institute for Conservation's guidance on light damage, even indirect and ambient indoor light causes cumulative fading over time. UV filtration slows this process dramatically but does not eliminate it.
How to Frame Art for Longevity: Step-by-Step
Knowing how to frame art for longevity means following a specific sequence. Skipping steps or substituting materials undermines the protection you're building.
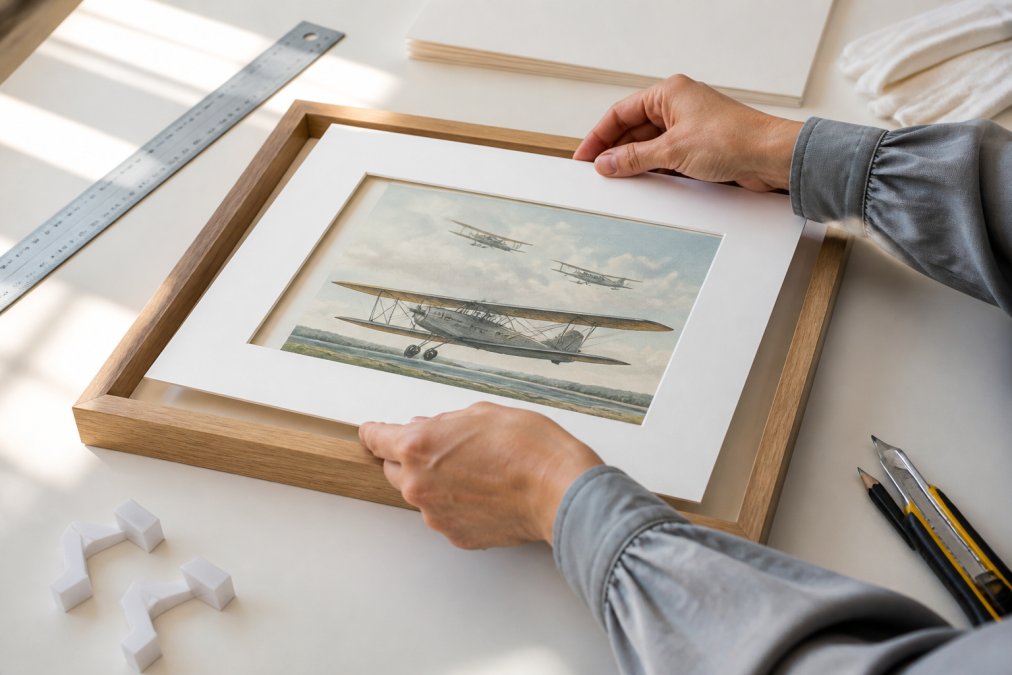
Step 1: Choose Your Frame and Check Frame Depth
Frame depth determines whether your glazing, mat, artwork, and backing all fit without the glazing pressing against the mat. A frame that is too shallow forces compression, which can crack glazing and damage the mat.
Check that your frame's rabbet depth accommodates:
- Glazing thickness (typically 2-3mm for glass, 2mm for acrylic)
- Mat board (typically 3-4mm for a double mat)
- The artwork itself
- Backing board (typically 3-5mm)
- A small gap for fitting points or backing hardware
Wood frames remain excellent. Avoid frames with raw, untreated wood interiors, as these can off-gas acids. Metal frames are generally inert and safe.
Step 2: Cut and Position Your Acid-Free Mat
Cut your mat so the window opening is slightly smaller than the artwork on all sides, typically by 3-4mm per edge. This overlap holds the artwork in place and hides uneven edges.
For double matting, the inner mat usually complements the artwork, while the outer mat is neutral. Double matting also increases the air gap between glazing and artwork, improving both appearance and protection.
Test the mat position before attaching anything. The artwork should sit flat with no bowing, and the mat window should be centered or slightly weighted toward the bottom, the gallery-standard approach.
Step 3: Hinge or Corner-Mount the Artwork
Attach the artwork using one of these reversible methods:
- Mounting corners: Slip the corners of the artwork into pre-positioned polyester or paper corners adhered to the backing board. No adhesive touches the artwork.
- T-hinges with Japanese tissue: Fold a small strip of Japanese tissue over the top edge of the artwork, adhering one half to the back with wheat starch paste and the other half to the backing board. Allow to dry fully before closing the frame.
- V-hinges: Similar to T-hinges but attached only to the back of the artwork, which hangs from the backing board. Better for heavier works on paper.
Never use masking tape, duct tape, or any pressure-sensitive tape.
Step 4: Install Glazing and Seal the Backing
Clean the interior face of your glazing thoroughly before closing the frame. Any dust trapped inside is permanent. Use a lint-free cloth and avoid products that leave residue.
Fit the glazing, mat, artwork assembly, and backing board into the frame in that order. Secure the backing with fitting points spaced no more than 75mm apart. Then seal the back with a dust cover, a sheet of kraft paper adhered to the back of the frame with archival adhesive, creating a sealed barrier against dust, insects, and humidity fluctuations.
How to Prevent Art Fading: Controlling Light, Humidity, and Temperature
Archival materials protect your artwork from the inside. Environmental control protects it from the outside. Both matter equally.
Light exposure is the most destructive environmental factor. UV light breaks down chemical bonds in pigments and paper fibers. Even with UV-protective glazing, cumulative light exposure causes fading over decades. Practical rules:
- Hang framed art away from windows that receive direct sunlight at any time of day
- Avoid positioning art directly under halogen or incandescent spotlights, which emit significant UV and heat
- LED lighting is the safest choice for illuminating art; most LEDs emit very little UV
Humidity causes paper to expand and contract, leading to rippling, cockling, and structural weakening. Relative humidity between 45-55% is the target range for most works on paper. Avoid hanging art on exterior walls, above radiators, or in bathrooms.
Temperature should be stable rather than low. Rapid temperature swings are more damaging than a consistently warm environment. Avoid uninsulated attics, garages, and spaces near heating vents.
As documented in the National Archives guidance on environmental storage conditions, stable conditions are more important than perfect conditions.
Digital Prints vs. Original Works on Paper: Do the Rules Change?
The framing rules for how to frame art for longevity apply to both digital prints and original works, but the underlying vulnerabilities differ.
Original works on paper, including watercolors, drawings, and traditional prints, are typically more sensitive to humidity and physical contact. Reversible mounting is especially critical because the work cannot be reproduced.
Digital fine art prints, including those from Runway & Heirloom Art, are produced on archival-quality inkjet paper using pigment-based inks, which are significantly more lightfast than dye-based alternatives. The paper substrate matters as much as the ink: prints on acid-free, cotton-rag paper will outlast those on standard coated stock by decades.
Practical differences in framing approach:
- Digital prints on coated paper are slightly less sensitive to humidity than traditional media but still benefit from stable conditions
- Pigment-based inkjet prints are more UV-sensitive than some traditional media, making UV-protective glazing especially important
- Mounting corners work as well for digital prints as for originals
The acid-free mat and backing board rule applies regardless of medium.
Troubleshooting Common Damage and Budget-Friendly Archival Options
Fixing Foxing, Rippling, and Yellowed Mats
Foxing (small brown spots, usually circular) is caused by mold or oxidation, often triggered by high humidity or contact with acidic materials. Mild foxing can sometimes be reduced by a paper conservator using controlled bleaching. If the piece is valuable, consult a professional conservator through the American Institute for Conservation.
Rippling or cockling in paper is usually caused by humidity fluctuations. If caught early, placing the artwork face-down under a clean, heavy board in a stable environment for several days can flatten mild cockling. For significant rippling, a conservator can use controlled humidification and pressing.
Yellowed mats indicate acid migration. The mat must be replaced. Stop the damage first by removing the artwork from the harmful environment, then assess what is salvageable.
How to Frame Art for Longevity Without Overspending
Conservation framing does not require a custom framer's budget. Many archival materials are available at accessible prices if you know where to look.
Where to save:
- Buy acid-free mat board in bulk sheets and cut it yourself; pre-cut mats are significantly cheaper than custom-cut versions from framers
- Use mounting corners instead of hinging tape; they cost almost nothing and are the most reversible option
- Standard UV-filtering acrylic costs less than conservation glass while offering comparable UV protection
- Ready-made frames in standard sizes are far less expensive than custom frames and work perfectly well with archival materials
Where not to save:
- The glazing: standard glass offers no UV protection and is not worth the marginal saving
- The mat board: cheap mat board is the fastest route to mat burn and yellowing
- The dust cover: kraft paper and archival adhesive cost very little and make a real difference
| Framing Element | Budget Option | Archival Upgrade | Skip Entirely? |
|---|---|---|---|
| Mat board | Acid-free alpha-cellulose | Cotton rag museum board | Never |
| Backing board | Acid-free foamcore | Archival corrugated board | Never |
| Glazing | UV-filtering acrylic | Conservation museum glass | Never skip UV protection |
| Mounting method | Paper mounting corners | Japanese tissue hinges | Never use tape |
| Dust cover | Kraft paper + archival tape | Professional backing paper | Not recommended |
| Frame | Ready-made wood or metal | Custom hardwood frame | Acceptable to use ready-made |
Framing a piece you care about is a commitment to its future. The prints you choose for a nursery, a study, or a living room deserve to still be there decades from now, with their colors intact and their paper sound. The steps in this guide are not complicated, but they do require using the right materials from the start. Runway & Heirloom Art prints are created with archival-quality inkjet paper and pigment-based inks precisely because they are meant to last. Pair that with acid-free matting, UV-protective glazing, reversible mounting, and stable environmental conditions, and you have everything you need to frame art that genuinely endures. Visit Runway & Heirloom Art to find prints worth preserving.
Frequently Asked Questions
What is the difference between standard and archival framing?
Standard framing uses whatever materials are cheapest, regular glass, non-acid-free mats, and foam or cardboard backing. Over time, the acids in those materials migrate into the artwork, causing yellowing, brittleness, and fading. Archival framing uses pH-neutral, acid-free components throughout: conservation-grade mat board, archival backing, reversible mounting methods, and UV-protective glazing. The goal is to isolate the artwork from anything that accelerates deterioration, so it survives decades rather than years.
Does UV-protective glass actually prevent art fading?
Yes, measurably so. Standard glass blocks almost no UV radiation, which is the primary driver of color fading in both fine art prints and original works on paper. UV-filtering acrylic blocks around 99% of UV rays, and museum-grade conservation glass offers similar UV filtration with added anti-reflection properties. Neither eliminates fading entirely, visible light still carries some energy, but UV-protective glazing dramatically slows the process compared to regular glass or no glazing at all.
What is the best way to mount art without damaging the paper?
Use reversible mounting methods. Archival linen hinging tape or Japanese tissue hinges attach the artwork at the top edge only, allowing the paper to expand and contract with humidity changes without buckling. Mounting corners made from acid-free materials are another fully reversible option, they hold the print in place without any adhesive touching the artwork at all. Avoid pressure-sensitive tapes, hot-melt adhesives, and dry-mounting, all of which permanently alter or damage the paper and make conservation very difficult later.
How does humidity affect framed artwork over time?
Paper and canvas absorb and release moisture as humidity shifts. In high humidity, paper swells and can develop rippling, mold, or foxing (brown spots). In very dry conditions, paper becomes brittle and can crack. The ideal range for most works on paper and fine art prints is 45-55% relative humidity, held as consistently as possible. Sealing the back of the frame with a dust cover and foamcore backing slows humidity exchange, giving the artwork more stable conditions even when the room's humidity fluctuates.
This article was written using GrandRanker