 how-to
How to Display Art History Prints at Home
Table of Contents
- Understanding Scale and Placement for Art History Prints
- Best Frames for Art Prints and How to Choose Them
- Gallery Wall Layout Ideas for Art History Collections
- How to Protect Art Prints from UV Light and Environmental Damage
- Lighting Your Art History Prints for Maximum Impact
- Hanging Without Damage: Mounting Hardware and Alternatives
- Rotating and Refreshing Your Collection
- Frequently Asked Questions
Last Updated: August 31, 2026
Understanding Scale and Placement for Art History Prints
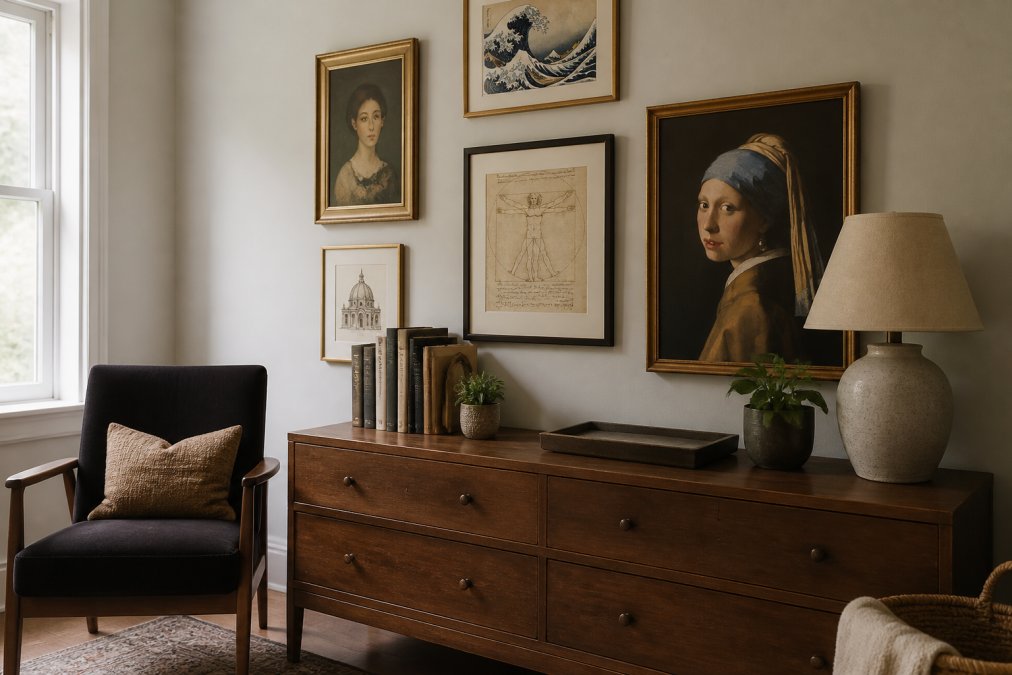
Getting scale right is the difference between a print that transforms a room and one that disappears into it. Most people underestimate how large a print should be, hanging something modest on a wall that demands presence.
The importance of eye-level positioning
Eye level is roughly 57-60 inches from the floor to the center of your artwork. This is where the human gaze naturally settles when standing in a room. A print positioned at eye level feels integrated into the space; hung too high, it floats above the room's life, disconnected and formal.
According to interior design research on spatial composition, artwork positioned at eye level creates an immediate focal point that anchors the room's visual narrative. The principle shifts slightly depending on context. In a hallway, aim for 60 inches. On a wall above a sofa, drop it to 55-57 inches so seated viewers connect with the piece. Above a console table or desk, 58-60 inches works well.
Sizing your prints to match your wall
A print that's too small for a wall creates visual imbalance. Your artwork should occupy 50-75% of the wall space available. For a wall above a sofa that's 8 feet wide, a 36-40 inch wide print creates visual weight without overwhelming.
2026 interior design trends on oversized statement art confirm that oversized prints are having a moment. A single large piece creates a cleaner, more assured look than multiple smaller prints competing for attention. When displaying art history prints, consider the subject matter too. A dense, detailed historical painting benefits from size; a minimalist abstract print can work smaller because it reads instantly. Whether you're drawn to Oil Painting Prints with their rich detail or Watercolor Art with their softer presence, scale should always serve the piece's character.
Best Frames for Art Prints and How to Choose Them
The frame is not decoration around the art. It's a conversation between the print and the room. The right frame amplifies the print's presence; the wrong one diminishes it.
Frame profiles and finishes that complement your décor
Frame profile sets the visual tone. A slim profile (under 1 inch) feels contemporary and minimal, letting the art dominate. A deeper profile (1.5-2 inches) adds formality and presence, useful for classical art history prints.
Black metal frames offer a crisp, graphic feel that grounds modern spaces and makes art history prints pop with visual authority. Natural wood tones soften the overall look and warm a room, especially for watercolor or impressionist-style prints. Matte black reads as sophisticated and contemporary, while glossy can feel dated.
Don't automatically match your frame to your décor. A black frame in a warm, wooden room creates intentional contrast that makes the art feel chosen, not matched. The frame should complement the print's color palette first, the room second.
Archival quality framing for long-term preservation
Archival framing is the difference between a print that lasts 10 years and one that lasts a lifetime. Archival-quality framing uses acid-free matting, UV-filtering glass, and lignin-free backing. Acid in traditional mats migrates into the paper over time, causing yellowing and deterioration.
art preservation guidelines on archival standards emphasize that museum-grade materials ensure prints remain vibrant and intact for decades. When selecting a framer, ask specifically about archival options. Request acid-free mats, UV-protective glass, and acid-free backing. For art history prints you plan to keep long-term, this investment protects both the art and your emotional connection to it.
Gallery Wall Layout Ideas for Art History Collections
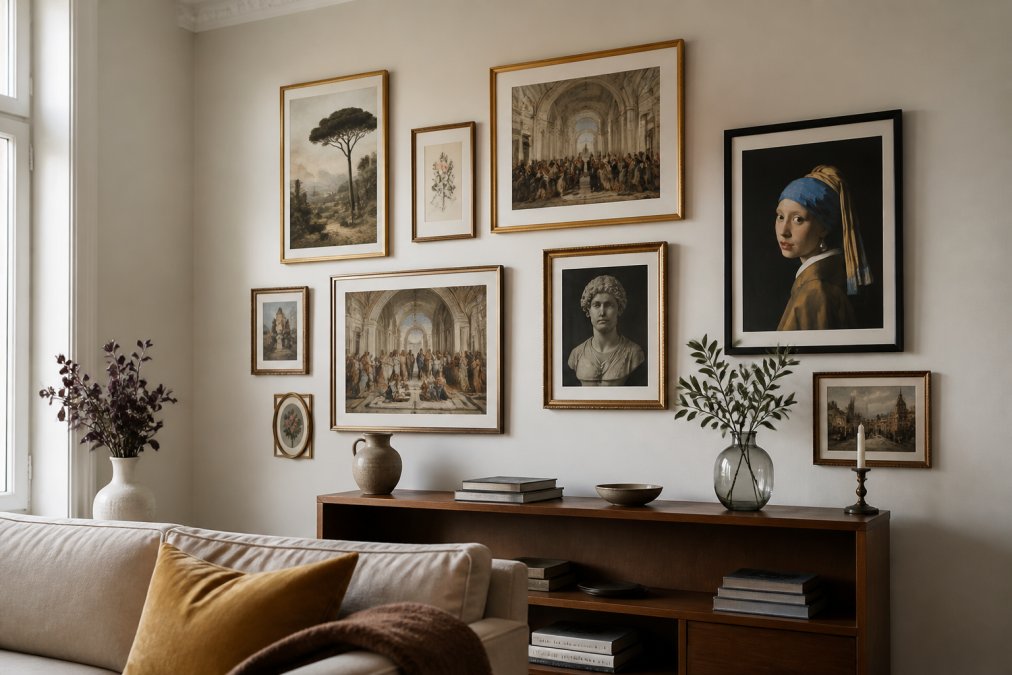
A gallery wall transforms a blank surface into a curated narrative. It's intentional arrangement that tells a story about your taste and interests.
Creating symmetrical and asymmetrical arrangements
Symmetrical gallery walls feel formal and structured. They work best in traditional spaces or when you have matching prints in similar frames. Asymmetrical gallery walls feel dynamic and personal, working well in contemporary spaces when mixing different print sizes, subjects, and frame styles.
The key to asymmetrical success is visual weight. A large, dark-framed print on the left needs balance, perhaps a cluster of smaller prints on the right. Step back frequently as you arrange, your eye will tell you when the composition feels balanced.
A practical approach: lay out your prints on the floor first in different configurations before hanging a single nail. Take a photo of each arrangement; your phone's camera helps you see the composition more objectively. This prevents regret and saves wall damage.
Spacing and visual weight in gallery compositions
Spacing between frames should be consistent, typically 2-3 inches creates a cohesive grouping. Too much space and the prints feel disconnected; too little and the wall feels cluttered.
Visual weight refers to how much visual presence each print commands. Distribute visual weight evenly across your gallery wall so no single area dominates. Create a hierarchy by choosing one or two "hero" pieces, your favorite art history prints, and making them larger or positioning them centrally. Arrange supporting pieces around them.
How to Protect Art Prints from UV Light and Environmental Damage
Art fades. The question is how quickly. Proper protection can extend the life of a print by decades.
UV-filtering glass and acid-free matting essentials
UV-filtering glass blocks ultraviolet radiation that causes fading and deterioration. Standard glass offers no UV protection; UV-filtering glass blocks 97-99% of UV rays, dramatically slowing the aging process.
Acid-free matting is equally critical. Traditional matting contains lignin and acid that migrate into the paper over time, causing yellowing and brittleness. Acid-free mats are chemically neutral and won't harm the print. According to conservation research on archival preservation, prints framed with these materials retain their color and integrity far longer than those in standard frames.
When framing art history prints, specify both UV-filtering glass and acid-free matting. This combination protects against the two primary threats to print longevity: light damage and chemical degradation.
Managing humidity and direct sunlight exposure
Direct sunlight is the enemy of print longevity. Position art history prints on walls that receive indirect or diffused light. Humidity fluctuations cause paper to expand and contract, leading to warping and buckling. Ideal humidity is 45-55%. Avoid hanging prints in bathrooms or near heating vents.
Temperature matters too. Avoid hanging prints above radiators, fireplaces, or air conditioning vents where temperature swings are dramatic. If you love a print but your ideal wall gets direct sun, consider using solar shades or curtains to filter light during peak hours. Alternatively, rotate your prints seasonally to reduce cumulative light exposure on any single piece.
Lighting Your Art History Prints for Maximum Impact
Light doesn't just illuminate art; it transforms it. The right lighting reveals detail, enhances color, and creates mood.
Positioning light sources for optimal visibility
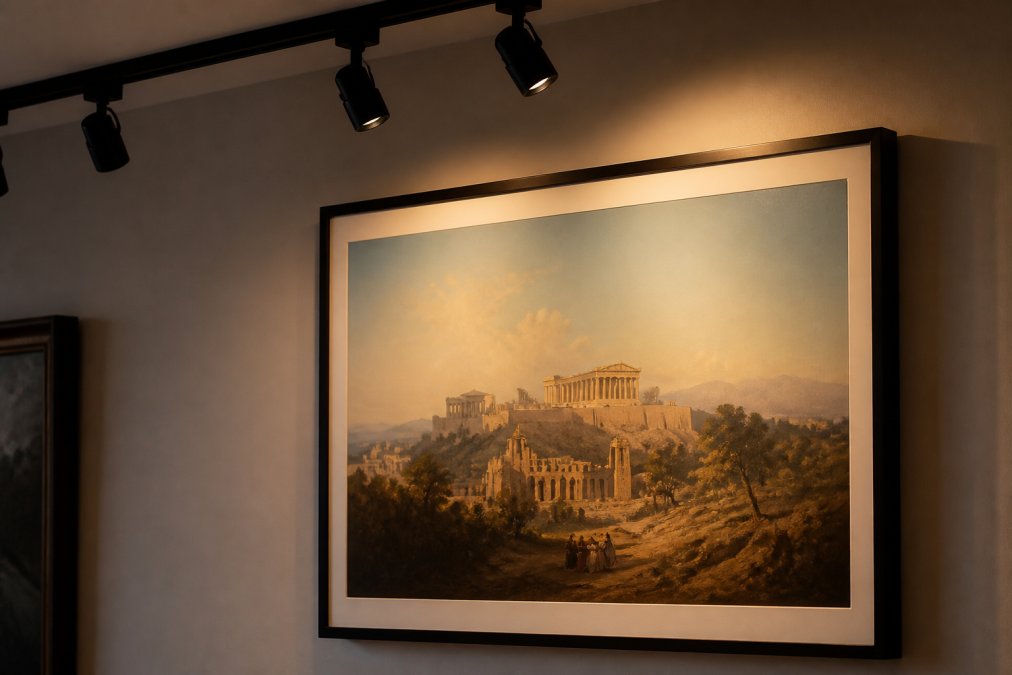
Track lighting positioned above or slightly in front of the print works best. Angle the light so it illuminates the print without creating glare on the glass. A 30-45 degree angle from the wall typically works well.
Picture lights, small fixtures mounted on top of the frame, are classic and effective. They direct light downward across the print, creating subtle shadow and dimension. Ambient room lighting should complement, not compete with, your art lighting.
LED lighting is superior to incandescent. LEDs produce less heat, consume less energy, and offer color temperatures that enhance art without distortion. Warm white LEDs (2700-3000K) feel inviting; for art history prints, warm white typically feels more natural. Lighting should be bright enough to reveal detail but not so bright that it washes out color.
Hanging Without Damage: Mounting Hardware and Alternatives
The method you choose to hang prints affects both the wall and the longevity of the frame.
D-rings, wire hanging, and damage-free options
D-rings are metal loops attached to the back of the frame. Wire strung between two D-rings distributes weight evenly and allows the frame to hang securely. This is the professional standard for gallery walls. D-rings work for prints up to 50 pounds.
Damage-free options like adhesive strips work for lightweight framed prints (under 5 pounds). They're ideal for rental spaces or temporary displays. For permanent installations, traditional hardware is more reliable.
For art history prints you plan to keep long-term, invest in proper mounting hardware. A frame that slips or hangs at an angle diminishes the art's impact and risks damage.
Rotating and Refreshing Your Collection
Your art doesn't have to be static. Rotating prints seasonally keeps your space feeling fresh and lets you display more art than wall space allows.
Seasonal rotation works beautifully. Display warm, energetic art history prints in summer; shift to cooler, more contemplative pieces in winter. Rotating also protects prints from cumulative light damage. A print displayed for six months, then rotated out for six months, receives half the light exposure compared to permanent display.
Create a simple system: store rotated prints in acid-free sleeves in a cool, dry place. Label each print with its display season or theme. This approach lets you build a larger collection than your walls can display at once, maximizing both your investment and your enjoyment.
At Runway & Heirloom Art, we design our prints to work in multiple contexts, nurseries, offices, living spaces, and studies. This versatility means a single print can move between rooms as your needs change, or rotate seasonally to keep your space feeling intentional and fresh.
Displaying art history prints at home is both an art and a science. The technical elements, archival framing, proper lighting, UV protection, ensure your prints endure. The aesthetic elements, scale, placement, curation, ensure they matter. Together, they transform prints from decoration into focal points that anchor a room and reflect your taste.
At Runway & Heirloom Art, we believe your home should tell your story. Our curated collection of art history prints, aviation artwork, and watercolor pieces are designed to be displayed thoughtfully, as part of your space's narrative. Whether you're creating a gallery wall, refreshing a nursery, or adding character to an office, choosing prints that speak to you is the first step. Displaying them with intention is the second. Get started with Runway & Heirloom Art and transform your walls into a reflection of what matters to you.
| Display Method | Best For | Durability | Reversibility |
|---|---|---|---|
| D-rings with picture wire | Permanent installations, heavier frames | Excellent | No |
| Adhesive strips | Renters, lightweight prints, temporary display | Good (up to 5 lbs) | Yes |
| Picture rails | Gallery walls, frequent rotation | Excellent | Yes |
| Floating shelves/easels | Tabletop display, small prints | Good | Yes |
=== FAQ ANSWERS (audit these too, same rules) ===
[1] Q: What is the best height to hang art history prints on a wall? A: Center the artwork at eye level, typically 57 to 60 inches from the floor to the center of the frame. This creates a natural focal point and ensures the print participates in the room's composition rather than floating above it. For gallery walls, maintain this eye-level anchor point for the largest or central piece, then arrange surrounding prints with visual balance in mind. Adjusting height by even a few inches can completely transform how integrated the piece feels within your space.
[2] Q: How do I protect art history prints from fading and UV damage? A: Use UV-filtering glass in your frames to block harmful ultraviolet radiation, and select acid-free matting to prevent deterioration of the print itself. Position prints away from direct sunlight and windows when possible. If direct sun exposure is unavoidable, apply UV-filtering window treatments or use low-intensity LED lighting instead of bright overhead lights. Museum-grade framing materials are designed to preserve prints under home conditions, though even archival-quality materials depend on a stable environment with controlled humidity and minimal temperature fluctuation.
[3] Q: Can I hang art prints without putting holes in my walls? A: Yes. Damage-free adhesive strips like 3M Command Strips work well for lightweight framed prints. Picture rails mounted along the wall offer a gallery-style alternative that allows you to hang and rearrange prints without new holes. Floating ledges display framed or unframed prints while adding storage. Easels and leaning frames against walls provide a flexible, temporary display option. These alternatives work best for lighter frames and prints; heavier or oversized pieces may require traditional mounting hardware for safety.
[4] Q: What makes the difference between museum-grade framing and standard framing? A: Museum-grade framing uses archival materials: UV-filtering glass, acid-free mats and backing, and lignin-free materials that resist deterioration over decades. Standard framing often uses regular glass and materials that can yellow or deteriorate, especially in variable home conditions. While museum-grade materials cost more upfront, they preserve the print's color, integrity, and longevity, essential if you want your art history prints to feel like heirlooms rather than temporary décor. Private homes experience fluctuating light, temperature, and humidity, so archival quality becomes an investment in endurance.
Frequently Asked Questions
Q: What is the best height to hang art history prints on a wall?
A: Center the artwork at eye level, typically 57 to 60 inches from the floor to the center of the frame. This creates a natural focal point and ensures the print participates in the room's composition rather than floating above it. For gallery walls, maintain this eye-level anchor point for the largest or central piece, then arrange surrounding prints with visual balance in mind. Adjusting height by even a few inches can completely transform how integrated the piece feels within your space.
Q: How do I protect art history prints from fading and UV damage?
A: Use UV-filtering glass in your frames to block harmful ultraviolet radiation, and select acid-free matting to prevent deterioration of the print itself. Position prints away from direct sunlight and windows when possible. If direct sun exposure is unavoidable, apply UV-filtering window treatments or use low-intensity LED lighting instead of bright overhead lights. Museum-grade framing materials are designed to preserve prints under home conditions, though even archival-quality materials depend on a stable environment with controlled humidity and minimal temperature fluctuation.
Q: Can I hang art prints without putting holes in my walls?
A: Yes. Damage-free adhesive strips like 3M Command Strips work well for lightweight framed prints. Picture rails mounted along the wall offer a gallery-style alternative that allows you to hang and rearrange prints without new holes. Floating ledges display framed or unframed prints while adding storage. Easels and leaning frames against walls provide a flexible, temporary display option. These alternatives work best for lighter frames and prints; heavier or oversized pieces may require traditional mounting hardware for safety.
Q: What makes the difference between museum-grade framing and standard framing?
A: Museum-grade framing uses archival materials: UV-filtering glass, acid-free mats and backing, and lignin-free materials that resist deterioration over decades. Standard framing often uses regular glass and materials that can yellow or deteriorate, especially in variable home conditions. While museum-grade materials cost more upfront, they preserve the print's color, integrity, and longevity, essential if you want your art history prints to feel like heirlooms rather than temporary décor. Private homes experience fluctuating light, temperature, and humidity, so archival quality becomes an investment in endurance.
This article was written using GrandRanker