 how-to
7 Steps to the Ideal Nursery Layout for a Calm, Safe Room
Last Updated: October 31, 2026
Quick Summary
The ideal nursery layout divides the room into three separate zones for sleep, feeding, and changing, with the crib on a solid interior wall away from windows, cords, and vents. Sketch your baby nursery floor plan to scale and test clearances, like 30 inches from crib to door, before moving furniture.
- Measure wall lengths, door swing, window placement, and outlets before buying any furniture.
- Keep the crib at least one foot from blind or curtain cords, and prefer cordless window treatments.
- Test a 30-inch path from crib to door and 12 inches between crib and any wall.
- Anchor every dresser, bookcase, and changing table to the wall with an anti-tip kit.
- In a small nursery, build upward with wall shelves and choose a convertible crib with drawers.
Table of Contents
- Step 1: Measure the Room Before You Move a Single Piece of Furniture
- Step 2: Zone the Room for Sleep, Feeding, and Changing
- Step 3: Where to Put the Crib in a Nursery
- Step 4: Build a Baby Nursery Floor Plan You Can Walk Through
- Step 5: Choose the Feeding Chair and Changing Station
- Step 6: Make a Small Nursery Layout Work Harder
- Step 7: Nursery Design Ideas That Grow With Your Child
- Plan Your Nursery Wall Art Around the Layout You Just Built
- Frequently Asked Questions
Step 1: Measure the Room Before You Move a Single Piece of Furniture
The ideal nursery layout starts with a tape measure, not a mood board. Before you buy a single piece of furniture, measure the room's length and width, then note the door swing, window placement, closet doors, and every outlet.
Here is what to write down:
- Wall lengths in inches, corner to corner
- Door swing and which way it opens
- Window height and width, plus how low the sill sits
The American Academy of Pediatrics safe sleep guidance is a good companion here, because it tells you how much clear space a crib needs around it.
Measure twice before you buy.
Step 2: Zone the Room for Sleep, Feeding, and Changing
A calm nursery has three zones: sleep, feeding, and changing. Each one needs its own corner, and they should not overlap. The sleep zone gets the quietest wall, away from the door and the street-facing window. The feeding zone goes near a light source and a side table.
Think of it as a small apartment with three rooms inside one. Traffic should flow between them without crossing the crib.
- Sleep zone: darkest, quietest corner
- Feeding zone: chair, lamp, side table
- Changing zone: dresser or table, storage within arm's reach
If two zones must share space, put feeding and changing together. Keep sleep separate.
Step 3: Where to Put the Crib in a Nursery
The best place for a crib is against a solid interior wall, away from windows, cords, and heating vents. That single rule solves most of the question of where to put crib in nursery setups. An interior wall stays warmer and blocks street noise better than an exterior one, and it usually keeps the crib away from the window treatments that create the most serious hazard in a nursery.
Crib Placement Rules That Matter for Safety
Follow these rules, and the crib placement question answers itself:
- Place the crib on a solid wall, not under a window
- Keep it at least one foot from any blind or curtain cord, and preferably use cordless window treatments in the room
- Leave clear space on all sides so you can reach the baby and change sheets
The Consumer Product Safety Commission crib safety guidance confirms that bare is best inside the crib: a firm mattress and a fitted sheet, nothing else. The American Academy of Pediatrics safe sleep guidance adds that the crib should be in the parents' room for at least the first six months, which is worth factoring into the layout if the crib will start out in your bedroom.
The Placement Risks Parents Underestimate
Crib placement is really furniture-placement safety, and a few hazards cause most of the injuries:
- Window cords. Looped cords from blinds and curtains are a strangulation hazard. Keep the crib well away from any window with a cord, and choose cordless shades or curtains for the nursery. If you cannot replace the window treatment, tie cords up high and out of reach.
- Tip-over hazards. Dressers, bookcases, and changing tables can tip if a child climbs or pulls on a drawer. Anchor heavy furniture to the wall with the anti-tip kit that comes with it, and do not put a television or heavy decor on top of a dresser.
- Shelves above the crib. A shelf or framed art hung over the crib can fall. Keep the wall above the crib clear, and hang decor on a different wall.
Once the crib is set, the walls around it become the next question. Parents can learn how to hang nursery art safely on those walls.
Step 4: Build a Baby Nursery Floor Plan You Can Walk Through
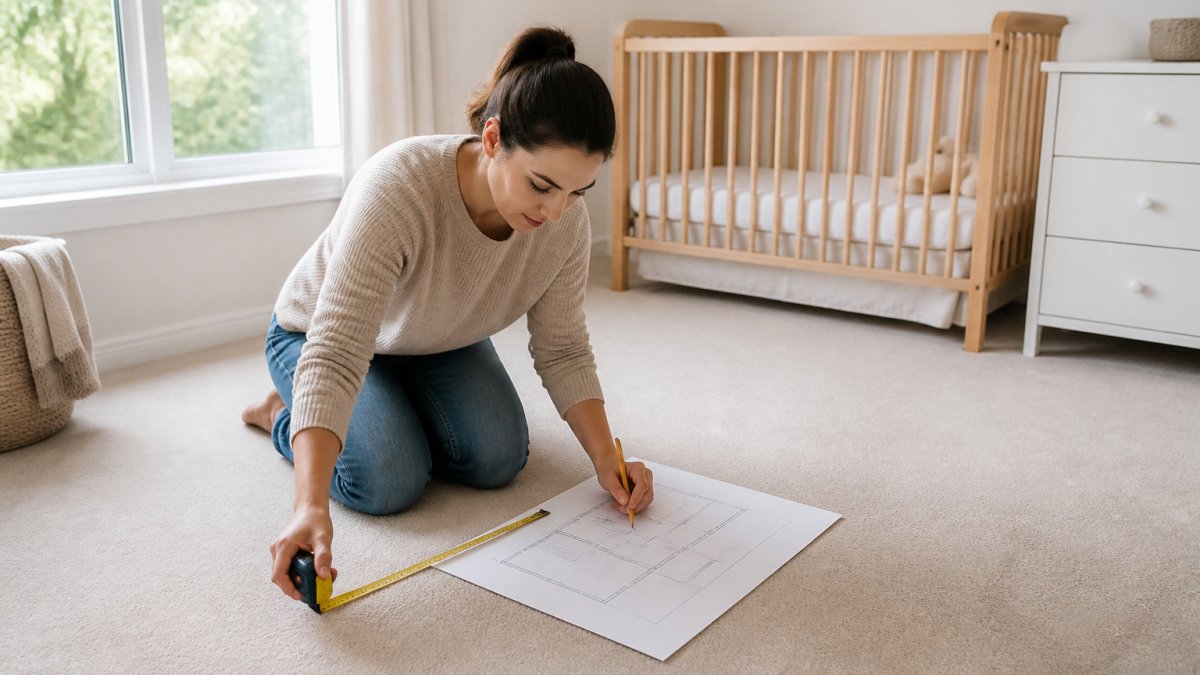
A baby nursery floor plan is a simple sketch of the room with furniture drawn to scale. You do not need software.
A Repeatable Measuring and Planning Workflow
Work through these steps in order before you buy or move anything:
- Sketch the room shell. Draw the walls to scale, then mark every door and note which way it swings and how far it projects into the room. A standard interior door is about 30 to 36 inches wide and swings roughly 90 degrees, so its arc can eat a 3-foot quarter circle of floor space.
- Mark the fixed features. Note window width, sill height, and which side the window opens; closet door clearance; outlet and vent locations; and any radiator or baseboard heater. These cannot move, so furniture has to work around them.
- Measure your furniture footprints. Record the actual width and depth of the crib, dresser, glider, and side table, not the dimensions on the product page alone. Add the depth of any drawer that pulls out and the swing of any recliner.
- Cut paper rectangles to scale. Slide them around the sketch until the paths below feel right. Move the crib first, because it has the least placement flexibility.
- Walk the plan with your arms full. If you would bump a corner at 3 a.m., move the furniture on paper now.
Clearances to Test Before You Commit
| Path | Minimum Width | Why It Matters |
|---|---|---|
| Crib to door | 30 inches | Night feedings and emergencies |
| Changing table front | 30 inches | You stand here one-handed |
| Chair to side table | 18 inches | Reach without standing |
| Dresser drawers | 24 inches | Full drawer pull-out |
| Between crib and any wall | 12 inches | Reach the baby and change sheets |
Sample Layouts for Common Room Shapes
Most nurseries fall into one of a few shapes. Use these starting points and adjust to your measurements.
- Square room, about 10 by 10 feet. Put the crib centered on the quietest interior wall, with the changing dresser on the opposite wall and the glider in the corner nearest the door. This keeps a clear path from door to crib and leaves the center open.
- Narrow room, about 8 by 12 feet. Run the crib along one long wall and the dresser along the other, leaving a single 30-inch aisle down the middle. Choose a slim glider that tucks into the far corner rather than a full recliner.
- Room with two doors. Treat the path between the doors as a hallway and keep it clear. Place the crib on a wall the path does not cross, and put the changing station near the door closest to a bathroom or diaper station.
Once the plan works on paper, mark the furniture positions on the floor with painter's tape and live with them for a day. It is far easier to move tape than a dresser.
Step 5: Choose the Feeding Chair and Changing Station
The feeding chair and changing station are the two pieces you will touch most, so buy for comfort and ergonomics, not looks alone. A rocker, glider, or recliner should let your feet rest flat and your back stay supported during long feeds. Sit in it before you buy.
For the changing station, a dresser with a secured changing pad on top saves floor space and gives you storage below. Keep diapers, wipes, and a spare outfit within one arm's reach so you never leave the baby unattended.
- Feeding chair: supportive back, armrests, easy to clean
- Changing station: pad strapped to the dresser, supplies at hand
- Lighting: a dimmable lamp, not an overhead light
Step 6: Make a Small Nursery Layout Work Harder
A small nursery layout succeeds when you build upward and choose furniture that does double duty. Floor space is precious, so use vertical storage: wall-mounted shelves, hanging organizers, and a tall dresser instead of a wide one.
Try these space savers:
- Convertible crib with drawers underneath
- Wall shelves above the changing station, out of reach of the crib
- Over-the-door storage for blankets and clothes
- A slim glider instead of a full recliner
Keep the center of the room as open floor space. That is where your baby will eventually crawl and play. Clutter eats that space fast, so store what you do not use daily out of sight.
Step 7: Nursery Design Ideas That Grow With Your Child
Nursery design ideas that grow with your child save you from redecorating in two years. Find ideas for a nursery in every style for broader inspiration. Choose a flexible design: neutral walls, a color palette you still like at age five, and furniture that converts from crib to toddler bed.
For wall decor, pick pieces with staying power. Browse nursery wall art collections that grow up with your child.
- Neutral base, accent colors you can swap
- Art that works at one year and at five
- Furniture that converts as the child grows
Plan Your Nursery Wall Art Around the Layout You Just Built
With the layout set, the walls become the fun part. Readers can explore printable nursery wall art ideas and printing guidance to fill the walls they've planned. See the guide to art for nursery color palettes for help choosing pieces.
Runway & Heirloom makes prints that tell a story, from watercolor nursery art to art-history-inspired pieces. Get started with Runway & Heirloom and give your nursery walls a story worth growing up with.
Frequently Asked Questions
What is the ideal layout for a nursery?
The ideal nursery layout puts the crib on a solid interior wall away from windows, cords, and the door swing, then groups a feeding chair and a changing station into separate zones with clear walking paths between them. Measure the room first, sketch a floor plan to scale, and leave at least 30 inches of clear space around the crib and changing area. Safety and reach matter more than symmetry, so place what you use most often closest to where you sit.
Where should you put a changing table in a nursery?
Put the changing table within arm's reach of diapers, wipes, and a change of clothes, and keep it off the main walking path so you are not turning your back on the baby near a doorway. Avoid placing it directly under a window with cords or curtains, and never against a wall where the door swings into it. A dresser with a secured changing pad on top works well in a small nursery layout because it serves two purposes.
How do you set up a nursery in a small room?
In a small nursery, choose a crib with a compact footprint, use vertical storage such as wall-mounted shelves, and pick multifunctional furniture like a dresser that doubles as a changing station. Keep the door swing and closet doors clear, and leave one open floor space for play and diaper changes. Mount art and shelves high enough to stay out of reach, and keep cords and monitor cables clipped to the wall.
How can you design a nursery that grows with your child?
Choose convertible furniture, such as a crib that becomes a toddler bed and a dresser that works for years, and keep the wall color and larger pieces neutral so you can swap art and accents instead of repainting. Leave a little open floor space for a play mat now and a small table later. Nursery design ideas that grow with your child focus on flexible storage and art you can rotate as interests change.